Whether you plan to anchor during an extended cruise or only overnight, it is important to have ground tackle−the anchor and related gear−that is more than adequate to handle all the conditions that your boat might encounter. Then…
Check Out the Anchorage
If the anchorage is unfamiliar, go slow and, if necessary, sound your way in. You might also want to check for obstructions in any areas where the wind or current might swing the boat and confirm that there will be sufficient depth under the keel should the tide fall, or as can happen in some waterways, the water level drop.
You'll also want to anchor in a location that does not foul another boat's swing radius, allowing for any differences in how the two boats might swing, as well as the possibility that if the weather worsens you or the other boat might need to let out more rode.

Steps to Anchoring
Some folks just throw their anchor overboard, and this is acceptable as long as the anchor is first brought back to the surface and cleared, if fouled. However, the following sequence of steps is a much better approach as it minimizes any opportunity for the anchor to become fouled in the rode, while maximizing its ability to set:
- Turn the boat into the wind or current.
- Stop forward momentum and as sternway is gained, lower the anchor.
- Back off and set the anchor.
- Once the anchor is set, let out more scope.
- Back down on the anchor.
- Install a snubber or bridle.
- Hang your day-shape and anchor light.
As simple as these steps are, there are some idiosyncrasies to overcome but to help avoid frustrations, here are some suggestions:
In step 1, if the wind and current are contrary to one another, head up into the one that will have the greater influence on the boat. If you are uncertain, stop the boat and see to which the boat responds best.
In step 2, gaining sternway (backing down) is frequently accomplished using the engine, but the wind or current can often be substituted for engine power.
In step 3, to set the anchor, back off the anchor at a distance approximately four to five times the depth of the water. In sand, the anchor usually sets rather quickly, but in mud the anchor might need to be dragged 40 or 50 feet before it dives deep enough into layers that are dense enough for it to set.
A unique behavior in mud is for the end of the shank of an anchor to end up below the flukes, which prevents the flukes from digging in. In this situation, particularly with Danforth and Fortress anchors, try backing off only two to three times the depth of water. This shorter rode has a tendency to keep the shank up, allowing the flukes to dig in.
In step 4, when calculating scope, add together:
- depth of the water
- height to the bow roller
- any additional height of the tide
However, as winds approach gale force, and especially storm force levels, it is important to also add in:
- depth that the anchor might bury (5-15 feet)
- height of any storm surge (3-15+ feet)
- height of the waves (1-6+ feet)
While considering the amount of scope to use, keep in mind that at 5:1 scope your anchor will have 50 percent less holding power than at 10:1 scope. So the higher the wind speed, or the poorer the protection from seas, the more scope you should let out, as much as 10:1.
For heavy weather, if any of these six components of scope were not included in the calculations or were underestimated, you should compensate by deploying scope greater than 10:1.
In step 5, the amount of force to use when "backing down" on the anchor is relative to the circumstances. For example, when the weather is settled and you will only be anchored for a short period of time, minimal (if any) additional backing down on the anchor is needed. On the other hand, for heavy weather you should back down hard enough to ensure that the anchor has a good enough set for the upcoming weather.
If the anchor won't hold, retrieve it and determine the cause. The anchor might be fouled, it might be too small or the wrong design, it may have landed upside down and could not upright itself, or something else could be causing it to not set. Correct the problem and give it another try.
If you are anchoring in mud, be sure that the anchor is bigger than what you would use in sand. For weedy areas, consider switching to a fisherman-style anchor. If you are anchoring where the seabed is solid coral or rock, maybe covered with a too-thin layer of soil, you only have three choices−auger in a helix anchor, use an anchor of tremendous weight or anchor elsewhere.
In step 6 in very mild weather, the snubber that you install need only be long enough to remove the load from the windlass' mechanism. For heavier conditions, however, the snubber must be long enough and of a large enough diameter to retain enough stretch to handle the wind gusts and surge loads that will be encountered, after the sustained wind has taken its share of stretch out of the rode.
In order to have enough of this "reserve stretch," snubbers and rope rodes should be made out of nylon rope that has at least 7 percent stretch at 15 percent loading and of a diameter that has a tensile strength that is at least 8 times the maximum load on the ground tackle. As for length, in gale force winds a snubber should be at least 30 feet long, and for storm force conditions, the snubber should be at least 40 feet long.
In step 7, COLREGS Rule 30 dictates that during the day an anchored boat must exhibit a black ball in the forepart of the vessel where it can best be seen, and at night and during periods of restricted visibility, a 360-degree white light. Only in Inland Rules are there "special anchorages" in which these requirements are waived. These "special anchorages" are few in number and must be designated by the Secretary of Homeland Security. A list of these anchorages can be found in 33CFR33.30 or in the applicable region's Coast Pilot.
Finally, use anti-chafe techniques where and when necessary. And for those who use an electric windlass, shut off the windlass' circuit breaker when you have finished with it to prevent activation of the windlass should a short occur.
As you become proficient with anchoring, experiment with the various aspects of it, tailoring your gear and techniques to your needs and Mother Nature's requirements. Anchoring is not always easy and it is often wet, dirty, hard work, but it is necessary work. Have fun with it!
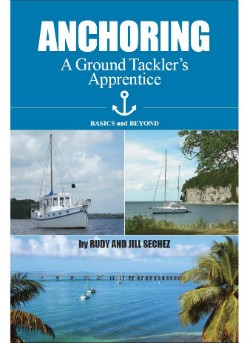
Find out more about veteran cruisers Rudy and Jill Sechez, Trawler Training and Anchoring Consultants, at their website: trawlertrainingabc.com. You can purchase their book, "ANCHORING−A Ground Tackler's Apprentice" through Waterway Guide Ship Store (waterwayguide.com).


- 4,000 Marinas
- Thousands of anchorages
- Updated Charts
- Mile-by-Mile Navigation
- Highlighted Alerts & Cautions
- Full-Color Aerial Photographs

The Waterway Guide App Makes it easy to leave reviews, use our explorer, and view waterway guide materials all on the go!